
fragment 发送广播可以使用localbroadcastmanager
RecycleView 局部刷新
1、实现该方法,通过 payload返回值控制刷新
// payloads是notifyitemchanged传过来的object的集合
public void onBindViewHolder(@NonNull RecyclerView.ViewHolder viewHolder, int position, @NonNull List payloads) {
}
2、调用notifyItemChanged方法;
3、局部刷新不生效可能原因:notifyItemChanged是否在UI线程;notifyItemChanged的position是否与该数据在数据集合中的位置一致(最好遍历一下数据集合找到对应的位置)。
Android Webview造成AutoSize显示异常
自定义Webview,实现setOverScrollMode方法
public class EWebView extends WebView {
public EWebView(Context context) {
super(context);
}
public EWebView(Context context, AttributeSet attrs) {
super(context, attrs);
}
@Override
public void setOverScrollMode(int mode) {
super.setOverScrollMode(mode);
AutoSize.autoConvertDensityOfGlobal((Activity) getContext());
}
}
android 库
涂鸦引用其他:https://github.com/1993hzw/Doodle
图片缩放引用:https://github.com/davemorrissey/subsampling-scale-image-view
Android应用内安装异常处理
1.权限
2.配置FileProvider
if (Build.VERSION.SDK_INT >= Build.VERSION_CODES.O) {

            boolean hasInstallPermission = getPackageManager().canRequestPackageInstalls();

            if (!hasInstallPermission) {

                startInstallPermissionSettingActivity();

            }

        }
@RequiresApi(api = Build.VERSION_CODES.O)

    private void startInstallPermissionSettingActivity() {
Uri packageURI = Uri.parse("package:" + BuildConfig.APPLICATION_ID);
//注意这个是8.0新API
Intent intent = new Intent(Settings.ACTION_MANAGE_UNKNOWN_APP_SOURCES, packageURI);
startActivityForResult(intent, 1);
}
4.安装
private static void apkIntentInstallNew(File apkFile,Context mContext){
Intent intent = null;
if (Build.VERSION.SDK_INT > 29){
intent = new Intent();
}else{
intent = new Intent(“android.intent.action.VIEW”);
}//这个地方需要注意
intent.addFlags(Intent.FLAG_ACTIVITY_NEW_TASK);
//Uri uri = Uri.fromFile(apkFile);
Uri uri = null;
//todo N FileProvider
//todo O install permission
if(Build.VERSION.SDK_INT >= Build.VERSION_CODES.N){
uri = FileProvider.getUriForFile(mContext,”应用包名.fileProvider”, apkFile);//file不用在这里new,直接在外边new然后传进来
intent.addFlags(Intent.FLAG_GRANT_READ_URI_PERMISSION);
intent.addFlags(Intent.FLAG_GRANT_WRITE_URI_PERMISSION);
}else{
uri = Uri.fromFile(apkFile);
}
intent.setDataAndType(uri, “application/vnd.android.package-archive”);
mContext.startActivity(intent);
}
Android Wifi连接
平板第一次使用的时候wifiManager.addNetWork()返回ID为0,ID为0也可以去连接。
Android ListView中TextWatcher问题
ListView中给每项的Edittext添加TextWatcher事件碰到问题:
当某一下edittext输入值触发afterTextChanged时候会触发其他项中textwatcher的aftertextchange事件。
修改前: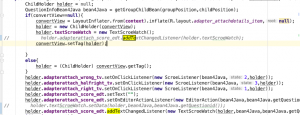
修改后: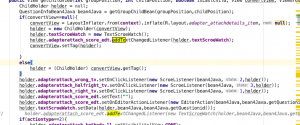
处理方法:
将textwatcher和holder绑定,只在初始化holder的时候初始化textwatcher,然后在每项单独设置textwatcher需要绑定的数据。
下载Google play里的应用
https://androidappsapk.co/search/googleplay/
https://www.apkmonk.com/download-app/
Android 键盘输入表情和颜文字禁用
public class EmojiExcludeFilter implements InputFilter {

   @Override
   public CharSequence filter(CharSequence source, int start, int end, Spanned dest, int dstart, int dend) {
      boolean hasManyType = false;
      int sourcelen = 0;
      for (int i = start; i < end; i++) {
         int type = Character.getType(source.charAt(i));
         Log.e("InputFilter","text:"+source.toString()+","+type);
         if (type == Character.SURROGATE || type == Character.OTHER_SYMBOL) {
            Log.e("InputFilter","text 133");
            return "";
         }
         sourcelen ++;
         if(type!=Character.UPPERCASE_LETTER&&type!=Character.BYTES&&type!=Character.DECIMAL_DIGIT_NUMBER&&type!=Character.OTHER_LETTER&&type!=Character.SPACE_SEPARATOR){
            hasManyType = true;
         }
      }

      if("◽".equals(source.toString())||"◼".equals(source.toString())||"◻".equals(source.toString())){
         Log.e("InputFilter","text:143");
         return "";
      }
      if("〰".equals(source.toString())||"〽".equals(source.toString())||"⤵".equals(source.toString())){
         Log.e("InputFilter","text:147");
         return "";
      }
      if("⤴".equals(source.toString())||"◾".equals(source.toString())||"⤵".equals(source.toString())){
         Log.e("InputFilter","text:151");
         return "";
      }
      if(hasManyType&&sourcelen>1){//处理
         Log.e("InputFilter","text:155:"+source.toString());
         return "";
      }

      Log.e("InputFilter","text:"+source.toString()+","+source.toString());
      return null;
   }
}
表情的type是单一数值可以直接筛选;
颜文字的type是有多种类型拼接起来的:常用字符(type:2),数值(type:9),中文(5),空格以及其他特殊字符组成,并且颜文字的长度肯定大于1。如果字符长度大于1并且包含特殊字符,可以判定该次输入为颜文字。
Android 系统录制屏幕
如果依赖版本是Android Q之后的版本,系统录制屏幕的方法需要有所变动:
1、需要将onActivityResult中返回的resultcode和data传给service,然后在service中获取MediaProjcection
MediaProjection mediaProjection = ScreenRecorderCtrl.getInstance().getProjectionManager().getMediaProjection(resultcode, data)
2、Mainfest对应service中添加如下属性
    android:enabled="true"
    android:foregroundServiceType="mediaProjection"
3、Service中onStartCommand中需要设置通知,该方法要在MediaProjection初始化之前
/**
 * 添加一个状态栏通知
 */
private void addNotification(){

    NotificationManager manager = (NotificationManager)getSystemService(NOTIFICATION_SERVICE);
    if(Build.VERSION.SDK_INT >= 26)
    {
        //当sdk版本大于26
        String id = "screenrecord";
        String description = "143";
        int importance = NotificationManager.IMPORTANCE_HIGH;
        NotificationChannel channel = new NotificationChannel(id, description, importance);
        manager.createNotificationChannel(channel);
        Notification notification = new Notification.Builder(this, id)
                .setCategory(Notification.CATEGORY_MESSAGE)
                .setSmallIcon(R.drawable.recoding)
                .setContentTitle("录屏服务 ")
                .setContentText("进行中")
                .setAutoCancel(false)
                .build();
        startForeground(1,notification);
    }
    else
    {
        Notification notification = new Notification.Builder(this)
                .setContentTitle("录屏服务 ")
                .setContentText("进行中")
                .setSmallIcon(R.drawable.recoding)
                .build();
        startForeground(1, notification);
    }
}
4、Service启动的时候
Intent service = new Intent(this, ScreenRecorderService.class);
service.putExtra("code", resultcode);//onactivityresult返回值
service.putExtra("data", data);//onactivityresult 返回值
if (android.os.Build.VERSION.SDK_INT <=26) {
    startService(service);
}else {
    startForegroundService(service);
}